Beginner tutorial: how to play MU Online and reach level 100
A complete guide for people who have never played (or came back after years): create an account, pick a class, controls, distribute points, where to level from 1 to 100 and common mistakes.
Updated on Oct 4, 2026 · OpenMU server data
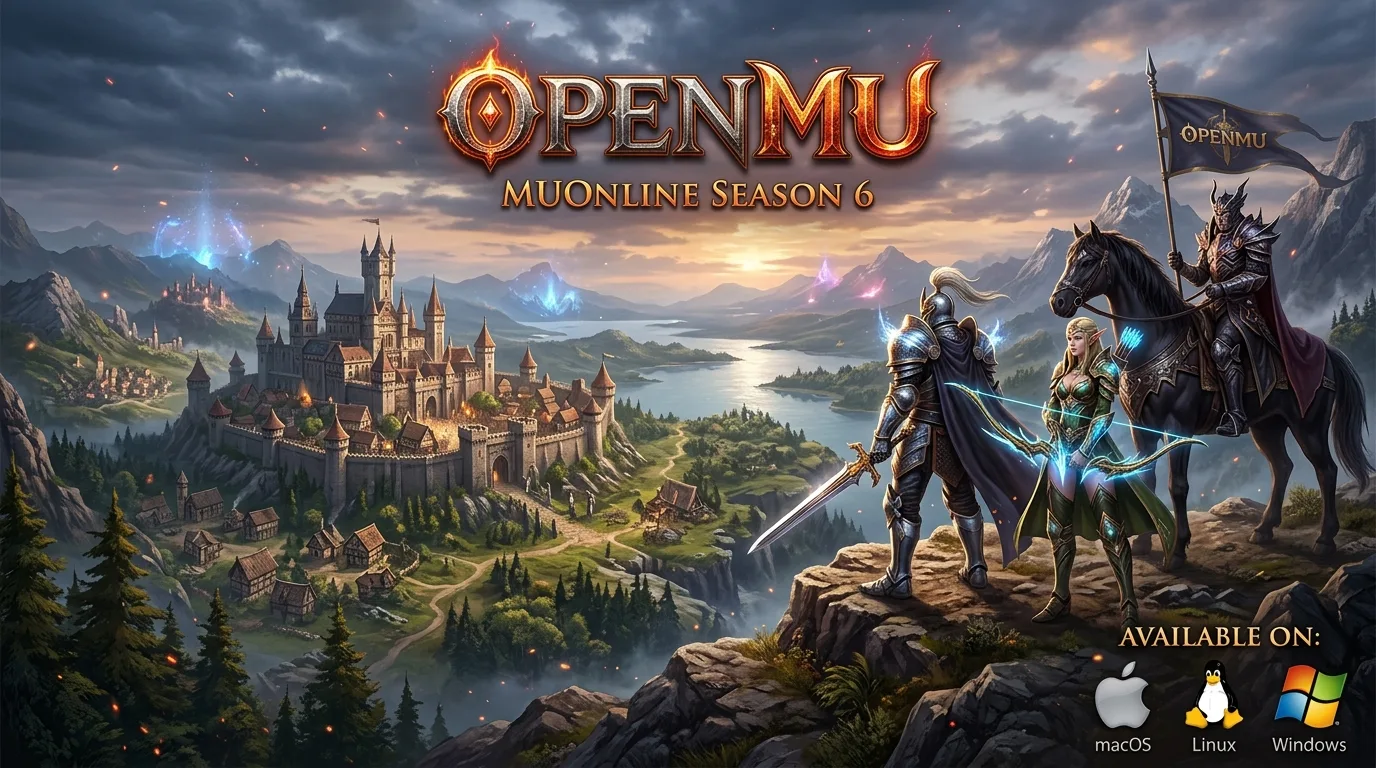
Returning to MU Online after 15 years, or playing for the first time? This guide takes you from zero to level 100, step by step, skipping nothing. On OpenMU experience is 20x, so level 100 arrives in a few hours, not weeks.
Step 1: create your account and enter the game
- Go to the sign-up page and create your free account (login, password and email). Every new account gets 5 days of Bronze VIP as a gift: +25% experience.
- Click Play now. The game runs right in the browser (Chrome, Edge or Firefox), with nothing to install. The first time the load takes a bit longer.
- Choose the OpenMU world, type your login and password and enter.
- On the character screen, create yours. Pick the class (see step 2) and a name.
Tip: want to see more before deciding? Read the classes guide.
Step 2: pick a class
If you want the simplest path, pick one of these:
| Class | How it plays | Difficulty for a beginner |
|---|---|---|
| Dark Knight | Sword, hits up close, takes a lot of damage | Easy: the most forgiving |
| Dark Wizard | Area spells from range, fragile | Medium: levels fast, but dies if surrounded |
| Fairy Elf | Bow, attacks from range and buffs the group | Medium |
| Summoner | Summons creatures and uses spells | Medium |
The Magic Gladiator, Dark Lord and Rage Fighter classes only unlock once you have another character at level 220, 250 and 150 on the account. They stay for later.
Want the straight advice? If you have not played in many years, start with a Dark Knight. It tolerates the most mistakes while you relearn the controls.
Step 3: learn the screen and the controls
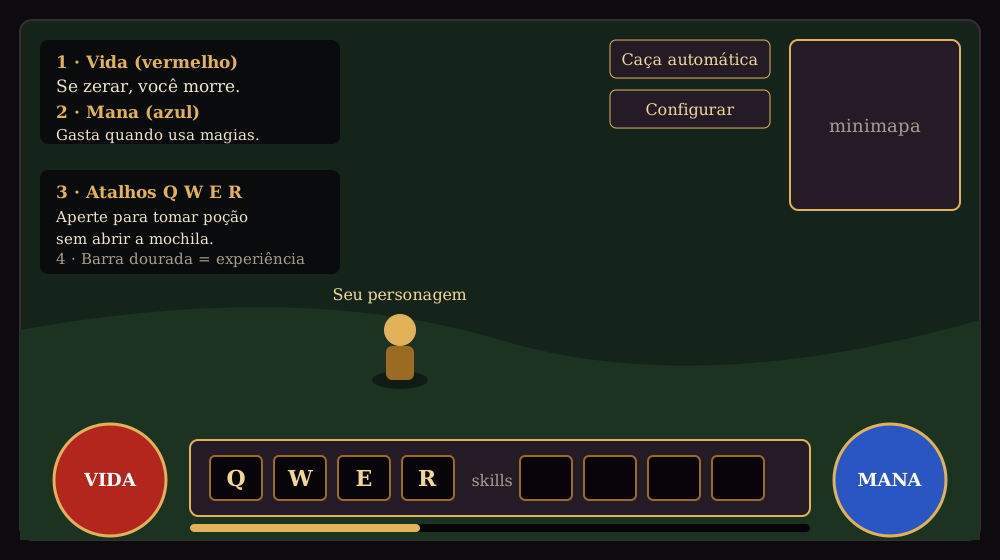
Simplified diagram: the exact position of each element may vary a little.
- Move: left-click on the ground.
- Attack: left-click a monster. Your character walks to it and attacks on its own.
- Use the skill/spell: right-click fires the selected skill (mages and elves rely on this a lot).
- Health (red) and mana (blue): they sit in the orbs on the sides of the bottom bar. If health hits zero, you die and return to town.
- Potions: buy from the town potion NPC, keep them in your bag and use the Q, W, E, R shortcuts to drink them without opening the bag.
- Character window (C): shows your points and stats. The bag (I) shows your items.
- Auto hunt: the Auto hunt and Configure buttons (left of the minimap) turn on the MU Helper, which attacks and uses potions for you. Useful, but do not trust it on dangerous maps.
- Chat: press Enter, type and Enter again. Commands start with
/.
Step 4: your first 10 minutes (level 1 to 10)
- Buy health potions right at the start. A potion is the difference between dying and leveling.
- Stay near town and attack the weakest monsters. In Lorencia: Spider and Budge Dragon. In Noria (Fairy Elf): Goblin and Chain Scorpion.
- Every level gives points to distribute. Open the character window (C) and use the + buttons on the stats.
- With 20x, you pass level 10 in minutes. Use that time to practice clicking and using potions.
How to distribute points (simple version)
Each level gives 5 points (7 on special classes). Think before spending: redoing points is not free.
| Class | Priority |
|---|---|
| Dark Knight | Strength (damage) and Vitality (health); a bit of Agility |
| Dark Wizard | Energy (spell damage) and Vitality; a bit of Agility |
| Fairy Elf | Agility (bow damage) and Energy (group buff); a bit of Vitality |
| Summoner | Energy and Vitality |
If in doubt, put everything in your class's main stat until level 50 and only then think about balancing.
Step 5: the route from level 10 to 100
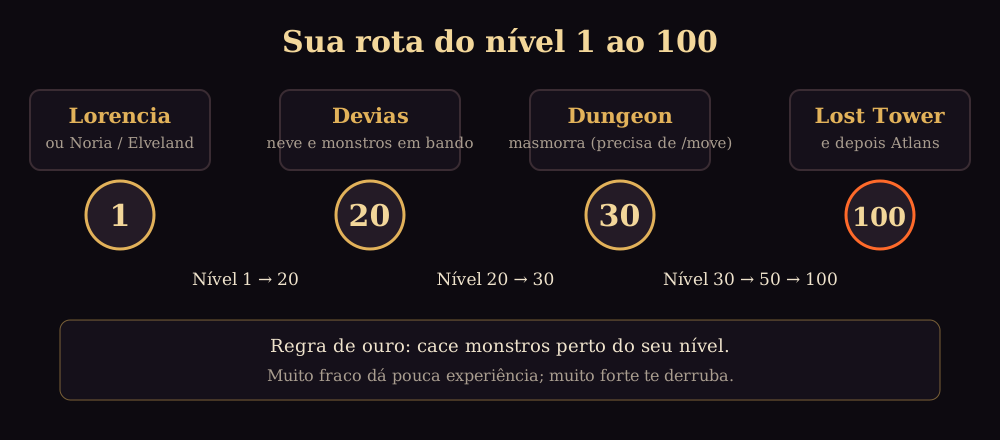
Use the /move map-name command in chat to travel. Each map has a minimum level and charges a little zen for the trip (2,000 to 5,000 on these maps). The table below is a summary; the full version with every monster is in the where to level guide.
| Level | Where to go | Why |
|---|---|---|
| 1 to 20 | Lorencia, Noria or Elveland (/move Lorencia) |
Safe maps, weak monsters |
| 20 to 30 | Devias (/move Devias, level 20) |
Ice monsters in packs: Worm, Ice Monster, Hommerd, Assassin |
| 30 to 50 | Dungeon (/move Dungeon, level 30) |
Cyclops, Ghost, Skeleton Archer, Hell Hound, Dark Knight |
| 50 to 70 | Lost Tower (/move LostTower, level 50; towers 4 and 5 require level 60) |
Lots of experience from monsters in groups: Shadow, Cursed Wizard, Death Cow |
| 70 to 100 | Atlans (/move Atlans, level 70; then Atlans2 at 80 and Atlans3 at 90) |
Bahamut, Vepar, Valkyrie; this is where you reach 100 |
Important: if the game refuses the trip, you probably lack level or zen. Go back one map and level a bit more. It is not a game error.
Step 6: how to level faster (without standing still)
- Stay in a spot with many monsters together and attack non-stop. Stopping to look at the screen costs more experience than it seems.
- Use a party: invite other players. Experience is split, but everyone kills much faster. Elves give attack and defense buffs to the group.
- Do the events: Blood Castle and Devil Square unlock from level 15 and give lots of experience and items.
- VIP: the VIP plans add +25%, +50% or +100% experience on top of the 20x.
- Do a 10-minute test on each new map: if you kill fast, use few potions and almost never die, stay. If it is hard, go back one map.
The 7 most common mistakes of returning players
- Going to a map that is too strong. Dying wastes time and zen.
- Forgetting potions. Always buy a few extra.
- Spending all points on the wrong stat. Reread the points table in step 4.
- Attacking from range without thinking: the Dark Wizard and Fairy Elf have low health; watch for monsters getting close.
- Playing solo all the time. Invite other players to a party.
- Ignoring the item shop. Swap the starter weapons and armor as soon as you can. New gear early makes a big difference.
- Sharing your password. Nobody on the team asks for your password. Never give it to anyone.
And after level 100?
The path continues: Tarkan, Aida, Kanturu, Icarus up to 200, and LaCleon from 280, up to level 400. At 150 you can already do the quests of Sevina the Priestess, in Devias, which lead to your second class. When you reach 400, learn to reset: you go back to level 10, gain extra points and get stronger every time.
That is it, now just enter and play. If you have questions, come back here: this guide is always kept up to date.